Adding features to Examples->ESP32->Camera->CameraWebServer
Posted: Wed Jun 26, 2019 4:35 pm
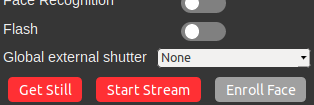
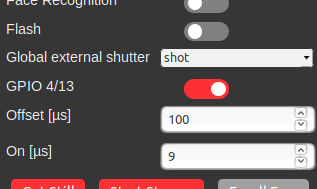
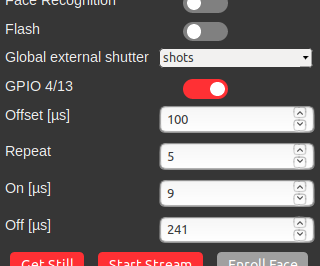
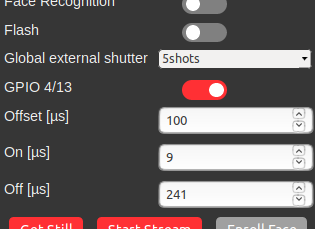
Yesterday I did solder a cable to 0.5mm spaced pin10 of ov2640 flat ribbon cable connector on ESP32-CAM module. Via that cable I can control FREX pin B2 (one of 38) of ov2640 image sensor. I want to create global external shutter captures with ov2640 FREX mode:
https://www.esp32.com/viewtopic.php?f=1 ... 445#p45445
I did global external shutter captures extensively with Raspberry v1 camera FREX mode already. For that I created a set of tools that can be executed separately and/or together to achieve various effects:
https://github.com/Hermann-SW/Raspberry ... tter#tools
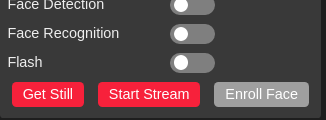
Since there is no shell on ESP32 module, I wanted to add the new FREX features to CameraWebServer example from ESP32 Arduino IDE. I had no idea what needed to be done, and decided to add a small feature first to find out which files(s) to change and which tools are needed. This posting will describe how I added a "Flash" checkbox to CameraWebServer applicaton of ov2640 sensor. It allows to turn the ESP32-CAM builtin flash on and off for lighting the captured scene:
CameraWebServer example directory under Linux can be found here:
There are 4 files:
And subdirectory index that is used to decode the index.html webpage, modify it and gzip it again.
First I needed a tool that extracts index.html.gz from top section of camera_index.h.
Find tool index/d.c attached, as well as tool index/c.c for conversion of gzipped modified index.html into byte array.
After looking into the files I was surprised that adding new feature is so easy.
This is the diff for app_http.cpp, just add one more case to existing "cmd_handler()":
And this is the (small !) diff for index.html:
That's it, loading CameraWebServer.ino into Arduino IDE, adjusting "ssid" and "password" to my WLAN, uncomment CAMERA_MODEL_WROVER_KIT define and commenting out CAMERA_MODEL_AI_THINKER, selecting "Tools->Partition Scheme" as "Huge App (3MB...", and then compiling and flashing to ESP32-CAM module!
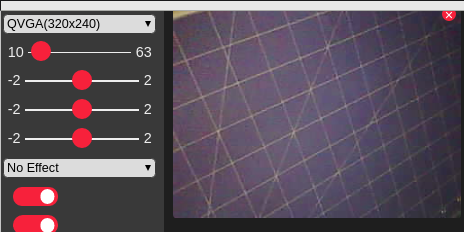
This is screenshot with Flash off:
And this with Flash on:
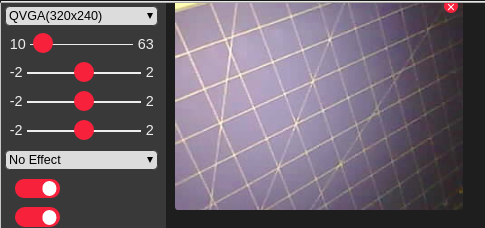
The ESP32-CAM module is connected with USB2TTY adapter to laptop USB, and there seems to be not enough power for continuously on ESP32-CAM flash. As human I see a lot of flickering, a little can that be seen on short video taken with smartphone camera:
https://www.youtube.com/watch?v=aZberpm ... e=youtu.be
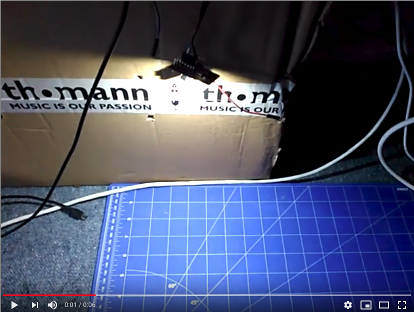
Now have fun adding your own features to CameraWebServer application ...
P.S:
I am really impressed of the ESP32-CAM flash brightness.
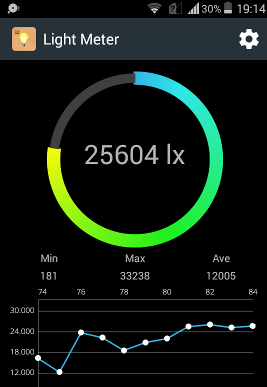
Android Light Meter app shows 25604 lux at 3cm distance between flash and smartphone:
P.P.S:
Partially broken ESP32-CAM module described in the other thread, flash on eliminates side shadows:
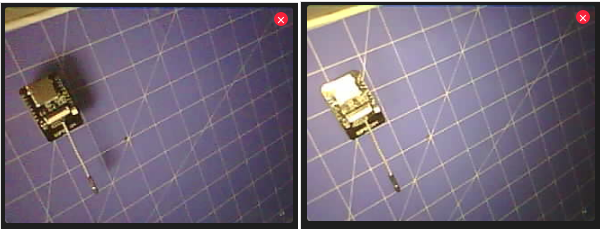
All screenshots are a bit smaller than 320x240 because "DCW (Downsize EN)" option was enabled.
https://www.esp32.com/viewtopic.php?f=1 ... 445#p45445
I did global external shutter captures extensively with Raspberry v1 camera FREX mode already. For that I created a set of tools that can be executed separately and/or together to achieve various effects:
https://github.com/Hermann-SW/Raspberry ... tter#tools
Since there is no shell on ESP32 module, I wanted to add the new FREX features to CameraWebServer example from ESP32 Arduino IDE. I had no idea what needed to be done, and decided to add a small feature first to find out which files(s) to change and which tools are needed. This posting will describe how I added a "Flash" checkbox to CameraWebServer applicaton of ov2640 sensor. It allows to turn the ESP32-CAM builtin flash on and off for lighting the captured scene:

CameraWebServer example directory under Linux can be found here:
Code: Select all
~/.arduino15/packages/esp32/hardware/esp32/1.0.2/libraries/ESP32/examples/Camera/CameraWebServer- app_httpd.cpp — the WebServer app
- camera_index.h — contains index.html.gz as byte array for serving
- camera_pins.h — #defines for 16 camera GPIO pins needed for different ESP32 models
- CameraWebServer.ino — the CameraWebServer Arduino sketch
And subdirectory index that is used to decode the index.html webpage, modify it and gzip it again.
First I needed a tool that extracts index.html.gz from top section of camera_index.h.
Find tool index/d.c attached, as well as tool index/c.c for conversion of gzipped modified index.html into byte array.
After looking into the files I was surprised that adding new feature is so easy.
This is the diff for app_http.cpp, just add one more case to existing "cmd_handler()":
Code: Select all
$ diff -c2 orig/app_httpd.cpp app_httpd.cpp
*** orig/app_httpd.cpp	2019-06-26 14:15:12.654361609 +0200
--- app_httpd.cpp	2019-06-26 15:54:14.682359257 +0200
***************
*** 521,524 ****
--- 521,529 ----
          }
      }
+     else if(!strcmp(variable, "flash")) {
+ #define LED_BUILTIN 4
+         pinMode(LED_BUILTIN, OUTPUT);
+         digitalWrite(LED_BUILTIN, atoi(value));
+     }
      else {
          res = -1;
$
Code: Select all
$ diff -c2 index/index.html.orig index/index.html
*** index/index.html.orig	2019-06-26 14:16:10.122873710 +0200
--- index/index.html	2019-06-26 14:20:54.560402494 +0200
***************
*** 535,538 ****
--- 535,545 ----
                              </div>
                          </div>
+                         <div class="input-group" id="flash-group">
+                             <label for="flash">Flash</label>
+                             <div class="switch">
+                                 <input id="flash" type="checkbox" class="default-action">
+                                 <label class="slider" for="flash"></label>
+                             </div>
+                         </div>
                          <section id="buttons">
                              <button id="get-still">Get Still</button>
$
This is screenshot with Flash off:

And this with Flash on:

The ESP32-CAM module is connected with USB2TTY adapter to laptop USB, and there seems to be not enough power for continuously on ESP32-CAM flash. As human I see a lot of flickering, a little can that be seen on short video taken with smartphone camera:
https://www.youtube.com/watch?v=aZberpm ... e=youtu.be

Now have fun adding your own features to CameraWebServer application ...
P.S:
I am really impressed of the ESP32-CAM flash brightness.
Android Light Meter app shows 25604 lux at 3cm distance between flash and smartphone:

P.P.S:
Partially broken ESP32-CAM module described in the other thread, flash on eliminates side shadows:

All screenshots are a bit smaller than 320x240 because "DCW (Downsize EN)" option was enabled.
